Licenses
1. Introduction
This document describes the licensing tool for the SealSign® product family, detailing all available options for both the graphical user interface and the command line. Since this document applies to any product within the SealSign® family, it is valid for:
- SealSign® DSS
- SealSign® BSS
- SealSign® TSA
- SealSign® CKC
- SealSign® DSR
- SealSign® BAS
Although “SealSign® DSS” appears as the product shown in the images throughout this document, the content is also applicable to the other products in the SealSign® family mentioned above.
2. SealSign® License Management - Options
SealSign® License Management is located in the Control Panel. If the computer's operating system is Windows 2008 or later, SealSign® License Management can be found under the Programs category within the Control Panel.
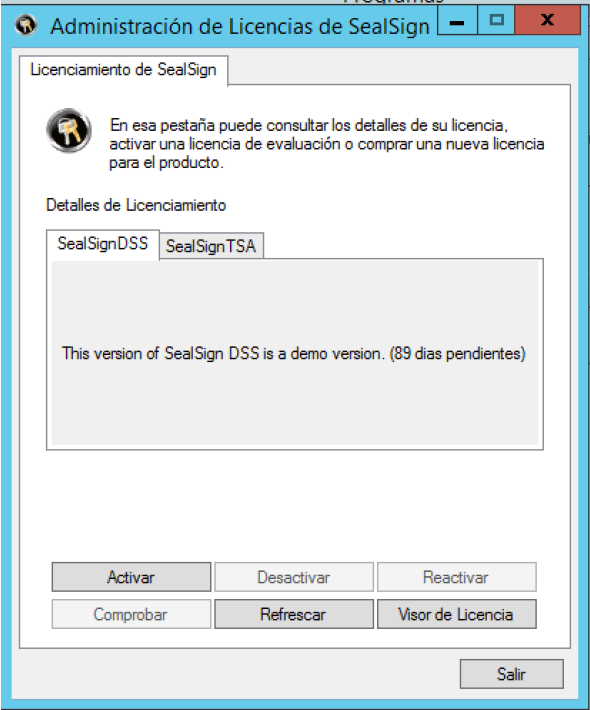
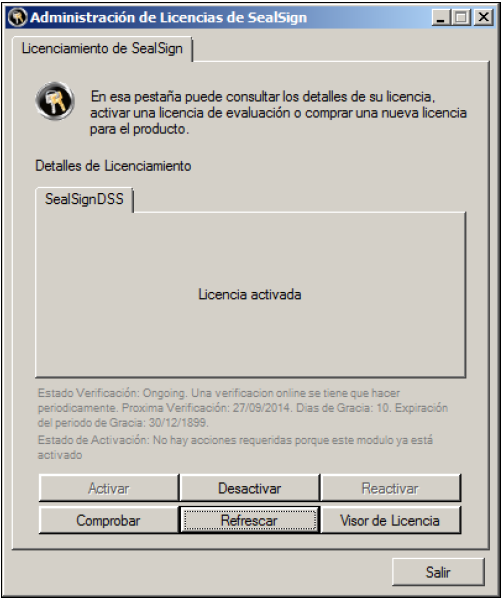
The tool looks like this:
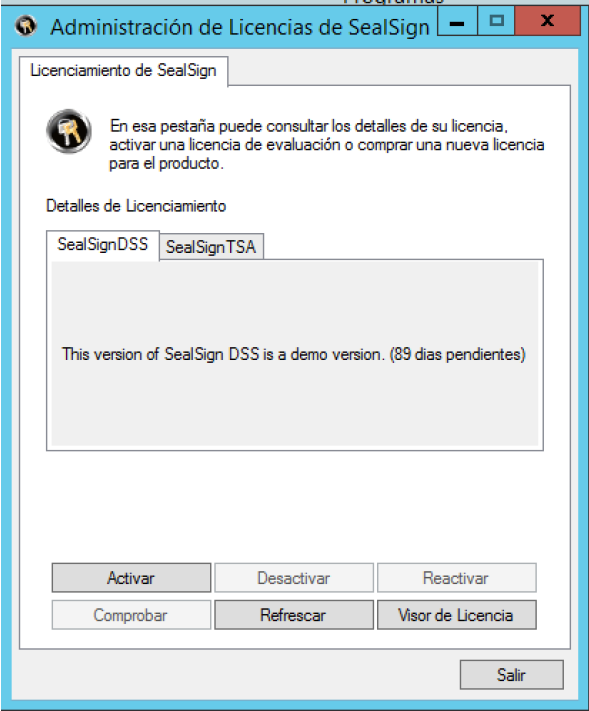
The interface provides different options regarding the licenses. These are:
-
Activate: If a license is in the evaluation period or expired, the Activate button will be enabled. Its function is to invoke the License Activation Wizard, as will be seen later. Once the product is activated, the license is associated with the computer hardware and cannot be reused on another computer under any circumstances.
-
Deactivate: If a license is activated and you want to deactivate it for migration to another computer, for a reinstallation of the server or for any other reason, this action will deactivate the product locally and the server will be notified to release the license. Therefore, this released license can be reused on any other equipment.
-
Reactivate: If a license has been deactivated and you want to be reactivated on the same computer, We will only have to use this option to associate the license again with the local team. Once the process is complete, the license is again associated with the computer's hardware and cannot be reused on other equipment in any way.
-
Check: Performs an online check against the Factum Identity servers to verify the status of the license.
-
Refresh: Reloads the current license page.
-
License Viewer: Shows a window with more detailed information about the license and its status (hardware association codes, last online verification, etc.).
3. License Activation
3.1 License Activation over the Internet
Once the SealSign® product is installed on a server, it must be activated within 90 days. To activate online, the administrator must perform the following steps:
- Start SealSign® License Management from the Control panel. If the computer's operating system is Windows 2008 or later, SealSign® License Management is located within the Programs category in that Control Panel. The following window will appear:
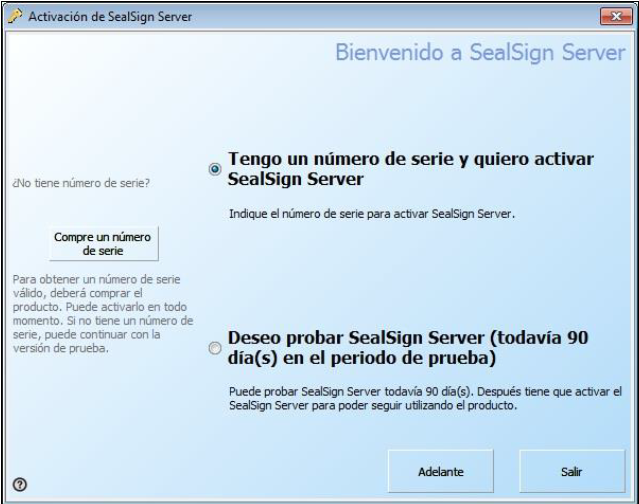
- Press the Activate button, select the option "I have a serial number and I want to activate SealSign® Server" and then click Next ("Adelante"):
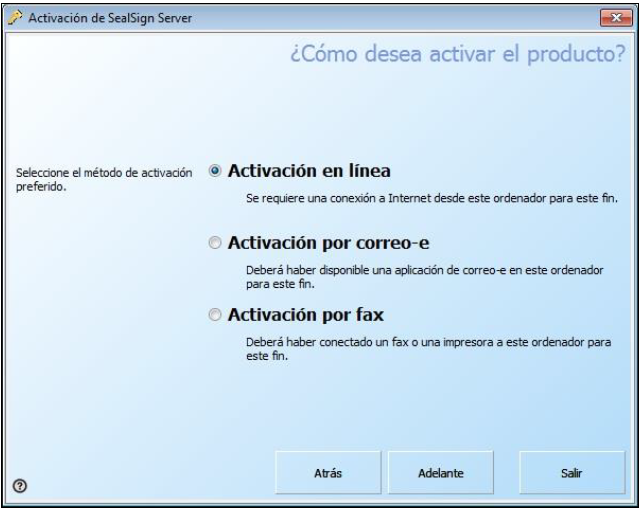
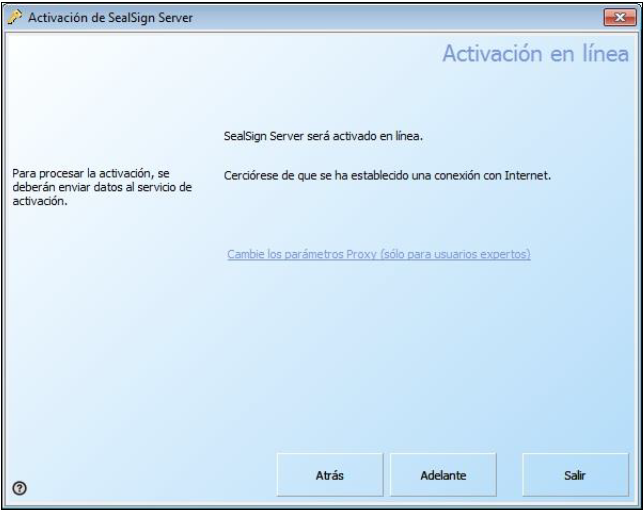
- Select the "Online Activation" option and click the Next ("Adelante") button:
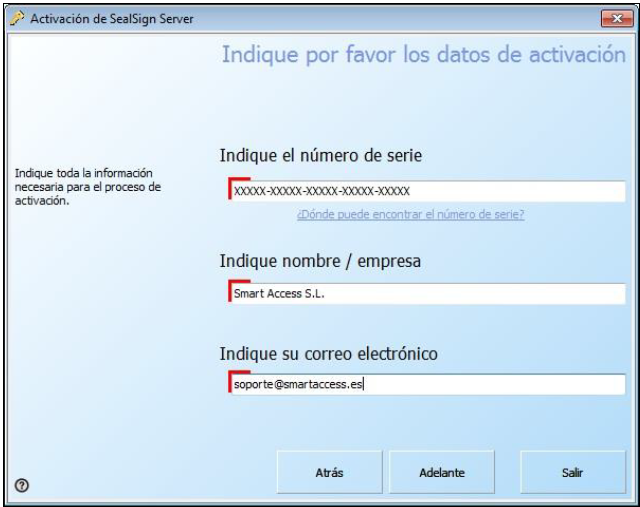
- Fill in the serial number, name/company and email fields and then click Next ("Adelante"). It is important to enter a valid email address to receive future Product updates and news:
- In the Online Activation window, if necessary, modify the proxy parameters by clicking the link, and press the Next ("Adelante") button:
- In the result window click the Next ("Adelante") button:
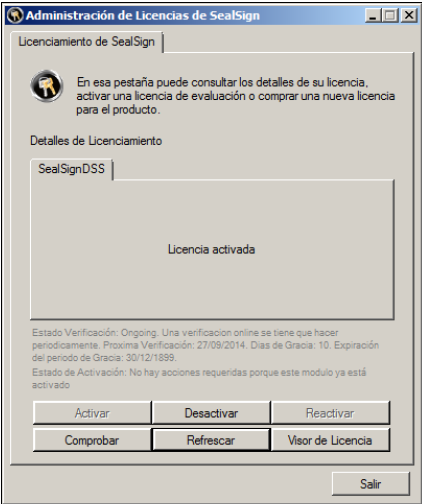
If the activation has been correct, the SealSign® License Management tab will display the updated status as shown in the following image:
3.2 License activation by email or fax
If the computer does not have an Internet connection, the administrator can activate the license via email or fax. To do so, the following steps must be performed:
-
Start SealSign® License Management from the Control Panel. If the computer's operating system is Windows 2008 or later, License Management is located within the Programs category.
-
Click the Activate button.
-
Select the option "I have a serial number and I want to activate SealSign® Server" and click the button Next ("Adelante").
-
Select the desired activation type.
-
Fill in the serial number, name/company, and email fields, and then click the Next ("Adelante") button.
-
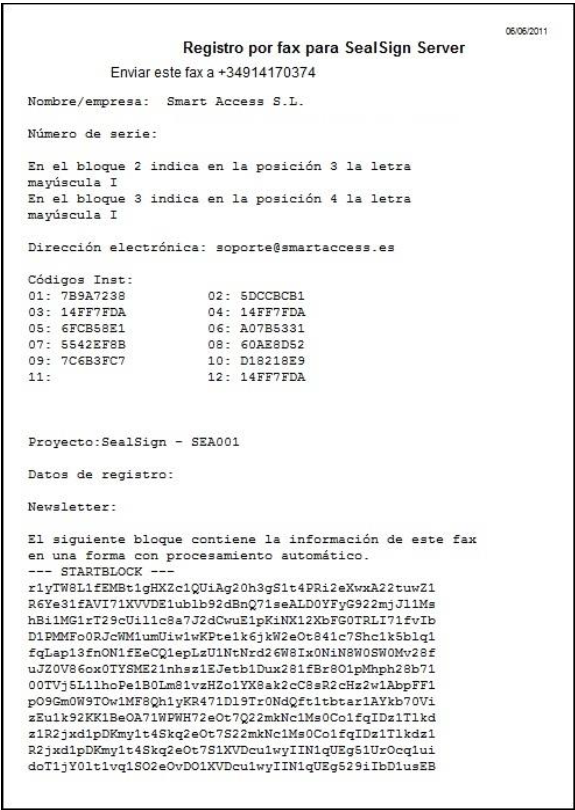
A fax or email similar to the following will be generated:
-
Send the email or fax as appropriate and click the Next ("Adelante") button. In response, you will receive two unlock keys to activate the license.
-
When the response is received, re-enter the wizard by clicking the Activate button on the SealSign® License Management tool.
-
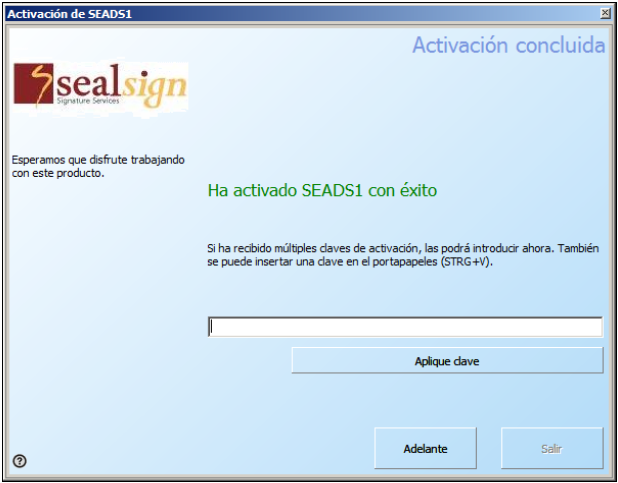
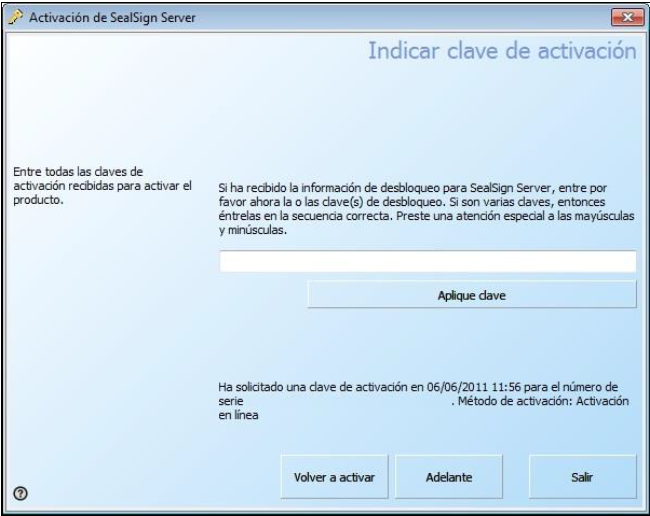
The activation wizard will now require the activation key obtained in response to the email or fax:
-
Enter one by one each of the activation key(s) received in response to the request and click the Apply Key button for each of them.
-
When all keys have been entered, click Next ("Adelante").
-
If the activation has been correct, the Licensing tab will show the
4. License Deactivation
This process requires an Internet connection. To carry out the deactivation, the administrator must perform the following steps:
-
Start SealSign® License Management from the control panel. If the operating system If your computer is Windows 2008 or later, SealSign® License Management is located within the Programs category in said control panel.
-
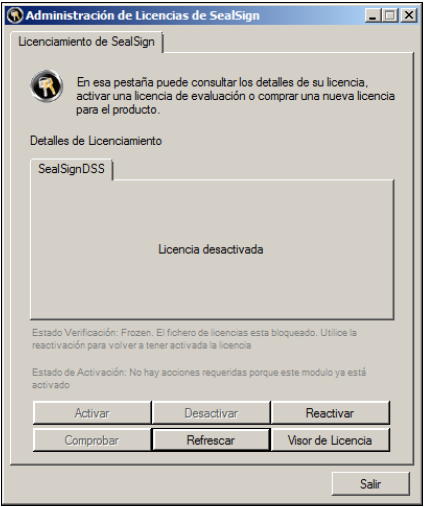
We press the Deactivate button and the deactivation process will begin. Once deactivated, the license it will look like:
5. License Reactivation
This process requires an Internet connection. To reactivate, the administrator must perform the following steps:
-
Start SealSign® License Management from the control panel. If the operating system If your computer is Windows 2008 or later, SealSign® License Management is located within the Programs category in said control panel.
-
We press the Reactivate button and the reactivation process will start. Once reactivated, the license it will look like:
6. Checking License Status
This process requires an Internet connection. To perform the health check, the administrator must perform the following steps:
- Start SealSign® License Management from the control panel. If the operating system If your computer is Windows 2008 or later, SealSign® License Management is located within the Programs category in said control panel. The following window will appear:

- We press the Check button and the verification process will start. Once verified, if the status is correct a message will appear like:
If an error occurs during the check or the license is not correct, an error message will appear in instead of the one shown above.
7. Show License Viewer
To display detailed license status information, the administrator must perform the following Steps:
- Start SealSign® License Management from the control panel. If the operating system If your computer is Windows 2008 or later, SealSign® License Management is located within the Programs category in said control panel.

- We press the License Viewer button and the process will start. The following window will be displayed:
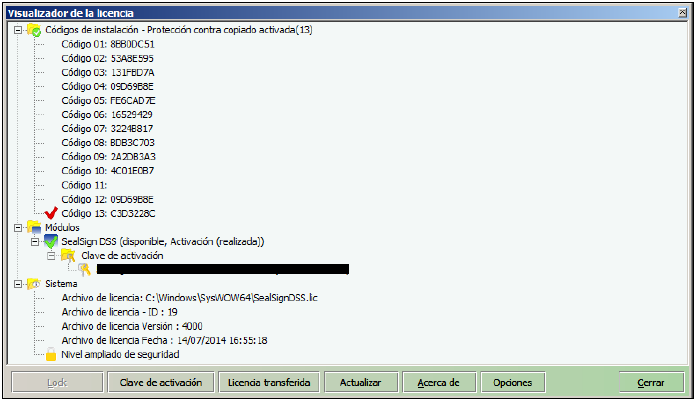
In this window we can apply activation keys, see the license code associated with the computer hardware (13), the activation key applied, the date of the license file as well as other relevant data for SmartAccess.
8. License Management via command line
In the command line examples that will be shown below, the following are being used assumptions:
-
It starts from the %WINDIR%\Syswow64 directory on 64-bit systems or %WINDIR%\System32 on 32-bit systems.
-
The examples will be made with the SealSignDSS.lic license file which belongs to the product SealSignDSS Service (Electronic Signature) of the SealSign® family. These examples are applicable to the rest of products from the SealSign® family as stated in the introduction of this document.
View license status SealSignADM.exe -p -l SealSignDSS.lic
Activate license SealSignADM.exe -a -e email@domain.com -s XXXXX-XXXXXXXXXX-XXXXX-XXXXX-XXXXX -l SealSignDSS.lic
Deactivate license SealSignADM.exe -x -l SealSignDSS.lic
Reactivate license SealSignADM.exe -r -l SealSignDSS.lic
Check License Status SealSignADM.exe -c -l SealSignDSS.lic
Show License Viewer SealSignADM.exe -v -l SealSignDSS.lic