SealSign Signature Client (ClickOnce)
1. Introducción
SealSign's ClickOnce client replaces the Java Applet in Windows environments. Its deployment is based on Microsoft's ClickOnce technology, which allows the deployment of applications over the Internet. The client is able to communicate bidirectionally with the browser that has launched the signature request to achieve a behavior similar to the integration of the Applet with the browser using JavaScript.
This communication is achieved using Microsoft's SignalR. More information about SignalR can be found on the official SignalR website.
From the following link you can access a project that contains an example of how to integrate with the SealSign Signature Client (ClickOnce):
2. Minimum requirements
- The client runs on .Net Framework 4.5.
- Supported operating systems are:
- Windows 7
- Windows 8
- Windows 10
- Windows Server 2008 R2
- Windows Server 2012
- The browsers supported by SignalR are:
- Microsoft Edge
- Google Chrome from version 50 onwards
- Mozilla Firefox from version 46 onwards
- Supported operating systems are:
3. Common tasks
3.1. Off-premises Installation
The ClickOnce client is hosted on Factum ID servers. On the download page you can install both the client and the client prerequisites. Once installed, the icon will appear on the desktop.
Image 01: SealSign ClickOnce icon.
3.2. On-premises installation
If it is necessary to deploy the client on a server other than the Factum Identity server, the following steps must be followed.
- Unzip the client found in the version 4.6 SDK download.
- To modify the ClickOnce deployment files, download and install the Windows SDK.
- Change the publishing URL with the following command:
mage -u SealSignClient.application -pu http://[URL]/SealSignClient.application - Reassign the application manifest with:
mage -u SealSignClient.application -AppManifest "Application Files "Application Files SealSignClient_1_0_0_0_0SealSignClient.exe.manifest" - Finally, sign the file with the command:
mage -sign SealSignClient.application -cf [certificate path] -pwd [certificate password]
Once these steps are done, the ClickOnce client can be deployed on the server. For everything to work correctly you have to check that the web server has the following MIME types configured:
- .application -> application/x-ms-application
- .manifest -> application/x-ms-manifest
- .deploy -> application/octet-stream
3.3. JavaScript client configuration
This tutorial explains in detail how to configure an environment with SignalR, and in the example hosted on Factum's gitHub you will find all the necessary code to make it work, it should be noted that once the client has been launched, it listens on port 8081 when it is http and 8082 when the connection has been configured by https. In the JavaScript part it will be necessary to:
-
Refer to the JavaScript code of the hub, located in the URL: https://localhost:8082/signalr/hubs and http://localhost:8081/signalr/hubs
-
Indicate the URL of the hub.
$.connection.hub.url = "http://localhost:8081/signalr" o "https://localhost:8082/signalr"; -
The SignalR's hub name is sealSignHub.
var hub = $.connection.sealSignHub; -
The application makes calls to different methods of the JavaScript client, either to notify that it is performing some task, or to notify that it has finished that task, or to tell the browser to redirect to a URL. The methods are:
-
Navigate:the application notifies the client that it should navigate to the URL it passes as a parameter. Normally it will be one of the URLs that have been defined as success, cancellation, rejection or error. Usage:
hub.client.Navigate = function (url) { } -
AsyncOperationStarted:The application notifies the client that an asynchronous, long-running operation has started. At this point the JavaScript client should relinquish control to the ClickOnce component. It attaches a message with the details of the operation. Usage:
hub.client.AsyncOperationStarted = function(message){ } -
AsyncOperationCompleted:the application notifies the client that it has completed and can take control. The function will receive a JSON parameter containing information about the status of the completed signing process, along with the document in Base64 format.
Json received as a parameter:
{"Content": null, // Document in Base64"Custody": false, // Whether document custody was configured"FileName": null, // Name of the document"BiometricSignatureGraph": "", // Signature graph in jpg format"Signed": false, // Whether the signature was completed"Status": "Canceled", // Signature status in text format (Canceled, CanceledExternally, Rejected, Finish)"Error": false, // Whether an error occurred"ErrorMessage": null, // Error message"IsExternalBiometricSignature": false, // Whether it is an external signature"IsCertificateSignature": false, // Whether it is a certificate-based signature"IsBiometricSignature": true // Whether it is a biometric signature}Usage:
hub.client.AsyncOperationCompleted = function(response){ } -
AsyncOperationInProgress: the application notifies the client that a signature is already in progress. Usage:
hub.client.AsyncOperationInProgress = function(){ }
-
3.4. Server version configuration
The client supports both SealSign version 3.2 and 4.0, but it is necessary to indicate which version is being used. To configure the version being used, the setServerVersion method must be called with one of these two values:
- V32: to use version 3.2.
- V40: to use version 4.0 or later.
If the function is not called, version 3.2 will be used by default.
4. Use cases
4.1. Running the client and launching at Windows startup
Once the client is installed the icon will appear on the desktop, to launch it just click on it, the following message will appear.
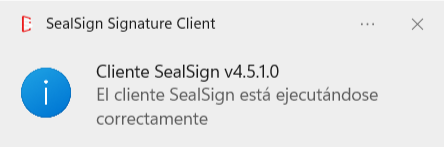
Image 02: Client message
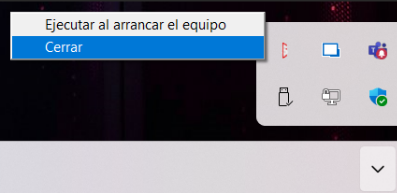
The client can be configured to start when logged on to Windows, to do this right click on the icon and click on the option "Run on computer startup".
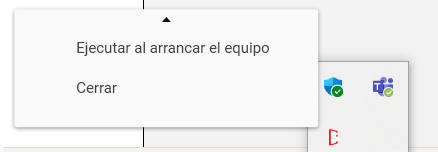
Image 03: Contextual menu of the tool
4.2. Using SSL connection
To use the secure SSL (HTTPS) connection, the SealSign Signature Client must be installed.
During installation or the first time the client is launched, a system window will appear requesting permission to make changes to the computer:
-
Users with administrator privileges
Will be asked to confirm the authorization. -
Users without administrator privileges
Will be prompted to enter administrator credentials.
Behavior when SSL configuration is not authorized
If the authorization is not accepted or the required credentials are not provided, the SSL configuration will not be applied and the Signing Client will operate using an HTTP connection.
Additionally, each time the Signing Client is closed and reopened, the authorization or credential prompt will appear again.
How to prevent the authorization prompt from appearing
To prevent this prompt from appearing repeatedly, you can disable automatic SSL management:
-
Locate the Signing Client icon in the system tray.
-
Uncheck the option “Automatic SSL Management”.
This will stop the client from requesting authorization on each startup.
Proper SSL (HTTPS) connection activation
If authorization is accepted or credentials are entered correctly:
-
The Signing Client will automatically configure SSL.
-
From that moment on, it will connect using HTTPS through port 8082.
Important note for environments with many non-privileged users
In environments where most users do not have administrator privileges and manually entering credentials on each machine is not feasible, the following procedure is recommended:
-
Install the SealSign Signing Client.
-
Do not enter credentials when prompted.
-
Disable “Automatic SSL Management” from the system tray.

-
Execute section 4.2.1 of this documentation.
4.2.1. Certificate Configuration
In order to use an SSL connection between the web and the SealSignh client, a certificate must be installed on the client computer and bound to port 8082.
Installing the certificate in the store. The certificate to be installed must contain the public key and the private key. To install it, double click on the file. An installation wizard is displayed.
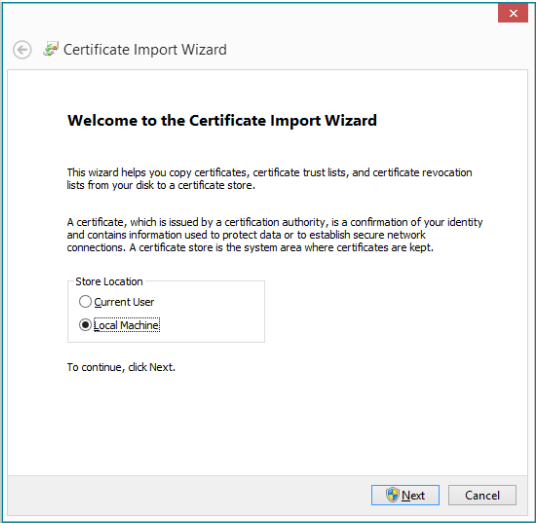
Image 04: Certificate import wizard
Select the "Local computer" store and click "Next". On the next screen, click "Next".
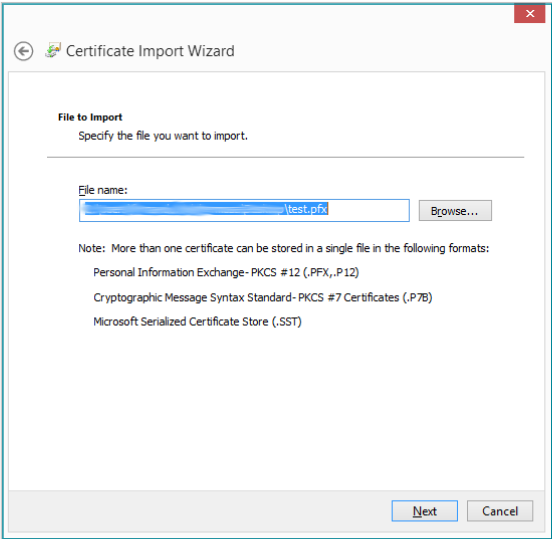
Image 05: Selection of the certificate to import
In the next screen we enter the certificate password and click "Next".
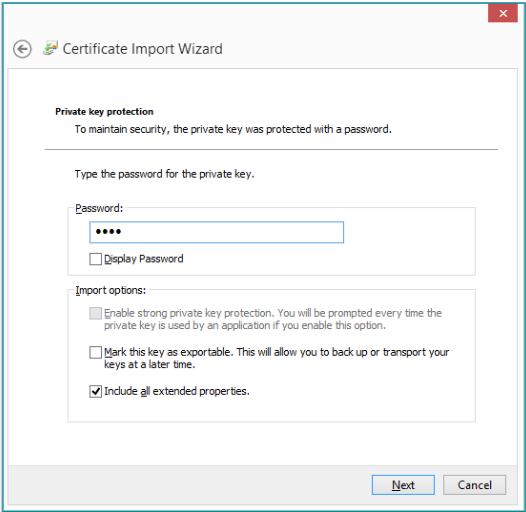
Image 06: Protection of the private key
On the next screen check the option "Place all certificates in the following store" and select the "Personal" store and click "Next".
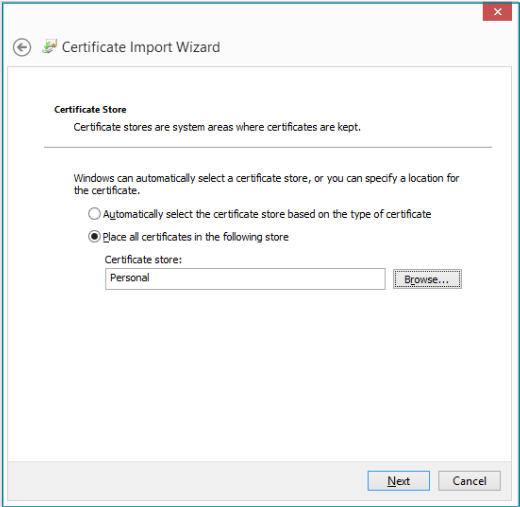
Image 07: Location of the certificates
In the summary window, click "Finish".
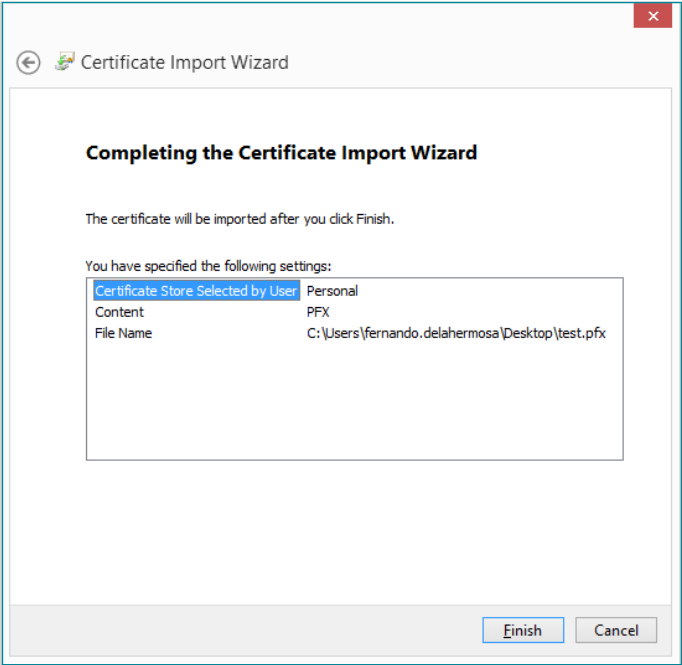
Image 08: Completion of the import
If there is no problem we should see the following message:
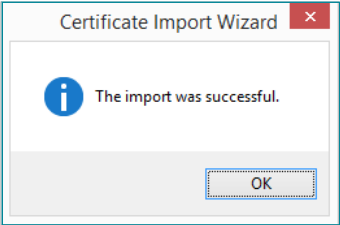
Image 09: Certificate successfully imported
Once the certificate is installed, the certificate manager is launched, for this we press the Windows+ R key and enter "certlm.msc", inside the Personal store we look for the certificate we imported previously.
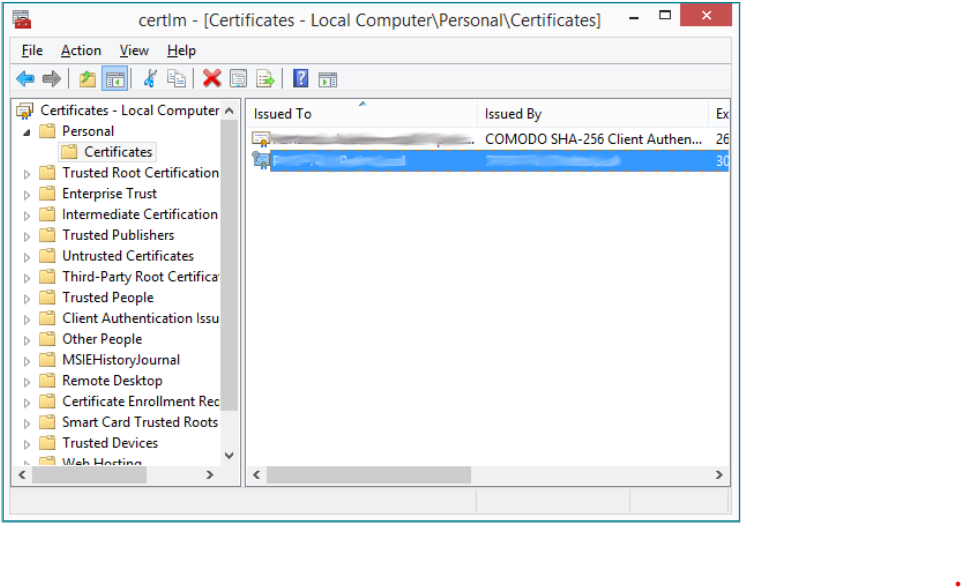
Image 10: Certificate Store
Double-clicking on the certificate will display the certificate details.
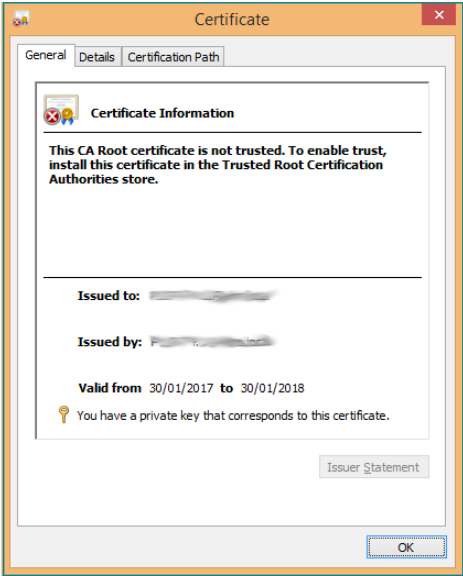
Image 11: Certificate properties
In the tab details select the property "Fingerprint".
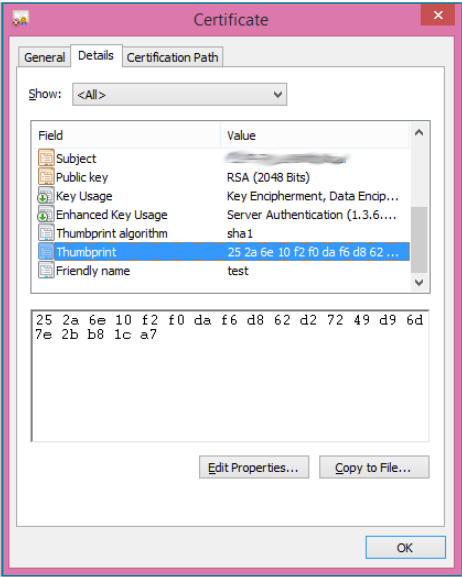
Image 12: Fingerprint of the certificate
With that value, you have to open the console in administrator mode and execute the following command:
netsh http add sslcert certhash=<certificate hash> ipport=0.0.0.0.0:8082 appid={00112233-4455-6677-8899-AABBCCDDEEFF}
This last instruction associates the certificate to port 8082.

4.2.2. Use SSL
In order for the client to use an SSL connection, the option must be selected.
- Refer to the JavaScript code of the hub, located in the URL: https://localhost:8082/signalr/hubs
- Indicate the URL of the hub. $.connection.hub.url = "https://localhost:8082/signalr";
4.3. Digital Signature
This describes which functions are published to perform the digital signature of documents, as well as the JavaScript client functions that are invoked to notify the progress and completion of the process.
4.3.1. Certificate filtering
When performing the digital signature it is possible to filter the certificates that will be displayed in the list. The filtering can be done by issuer, by hashy by serial number:
- setCertificateIssuerFilter: Filter by issuer, receives as parameter the valid issuers separated by '|'. Used to show only DNIe certificates: hub.server.setCertificateIssuerFilter('AC DNIE 001');
- setCertifciateHashFilter: Filter by hash, receives as parameter the hash of the certificate to sign with. Usage:hub.server.setCertificateHashFilter('[HASH]');
- setCertificateSerialFilter: Filter by the serial number of the certificate. Usage: hub.server.setCertificateSerialFilter('[SERIAL NUMBER]');
4.3.2. Resetting filters
To remove all filters set on certificates, the resetCertificateFilters function must be called.
4.3.3. Loading a local certificate
A document can be signed using a locally stored certificate by calling the function loadLocalCertificate, to stop using this certificate call the function clearLocalCertificate.
4.3.4. Document Signature
The signing process can be performed in the following ways.
- Parameters: All digitalSign method overloads receive as first parameter a string array where the signature is parameterized, these parameters are:
- URI of the document.
- URL of the service.
- Success URL.
- Error URL.
- Cancellation URL.
- Basic authentication user.
- Basic authentication password.
All parameters are mandatory, if any of them must be passed empty it will be passed as null.
- digitalSign (string[]): The document is signed according to the parameters passed using the default configuration of the document provider.
- digitalSign (string[], string): The document is signed according to the parameters passed using the document provider configuration passed as the second argument.
- digitalSignUrl(string[], string): The document found at the given URL is signed. The document provider with the default configuration is used.
- digitalSignUrl(string[], string, string): The document at the given URL is signed. The last parameter is the parameters to use with the document provider.
- digitalSignBase64(string[], string): The document passed as parameter is signed in base 64. The document provider is used with the default configuration.
- digitalSignBase64(string[], string, string): The document passed as parameter is signed in base 64. The last parameter is the parameters to use with the document provider.
- digitalMultiSign (string[], string): A list of documents is signed using the default configuration of the document provider.
- digitalMultiSign (string[], string, string): A list of documents passed as parameter is signed. The last parameter is the parameters to use with the document provider.
4.3.5. Using Remote Document Provider
In order to use the Remote Document Provider, the configuration parameters must be set, for which the following steps must be followed:
- Set the server version to 4.0 by calling the setServerVersion method with the value 'V40'.
- Call the function setDSSRemoteProviderConfiguration with the following parameters:
- url: the url where the Remote Document Provider is hosted.
- domain: domain of the user with which the call to the Remote Document Provider will be authenticated.
- user: user with which the call to the Remote Document Provider will be authenticated.
- password: password of the user with which the call to the Remote Document Provider will be authenticated.
Important: if the call needs to be authenticated, the authentication will be basic.
4.4 Biometric Signature
4.4.1 Prerequisites for Performing Biometric Signing
- If signing with ePad-Ink tablets, a 32-bit ePad driver must be installed on the computer.
- If signing with a Wacom STU-540 or higher, 32-bit Java must be installed on the computer.
4.4.2 Device settings
The following functions only affect Wacom devices:
- setClearImage: Sets the background image of the tablet when the signature process is completed. The image is passed in base64.
- setClearImageUrl: Sets the background image of the tablet when the signing process is completed. The image is hosted at the URL passed by parameter.
4.4.3 Document Signature
- Parameters: The first parameter of the different signatures of the biometric signature methods is a string array that configures the behavior of the component.
- Document URI
- URL of the service
- URL of the document to sign
- Padding X lower left corner
- Padding Y bottom left corner
- Success URL
- Error URL
- Cancellation URL
- Reject URL
- Basic authentication user
- Basic authentication password
- Acceptance view title background color
- Acceptance view title
- Acceptance view title color
- Identifier
- Label "Step
- Label "from
- Sign button - Signature screen
- Continue button - on all screens
- Clear button - Signature screen
- Cancel button - on all screens
- Reject button - on all screens
- OPTIONAL text above on the signature screen
- XML with the configuration of the previous screens form (Optional, can be left blank if previous screens are not desired)
NOTE: This parameter is optional only in versions higher than v4.4 - XML with the configuration of the final screen form with the signature panel (Optional, can be left blank if the final screen is not to be customized)
NOTE: This parameter is added in versions higher than 4.4 - Global Customization Parameters (Font, Sale Width and Height, Font Size)
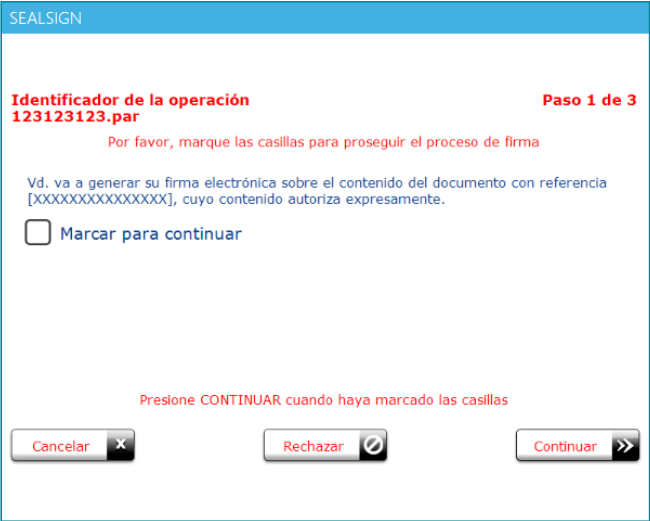
- Form: For the handwritten signature process a form can be added in which the user must select several checks in order to advance in the process and finally sign the signature. The configuration of this form is the last parameter of those described in the previous section.
This is an example of a valid XML:
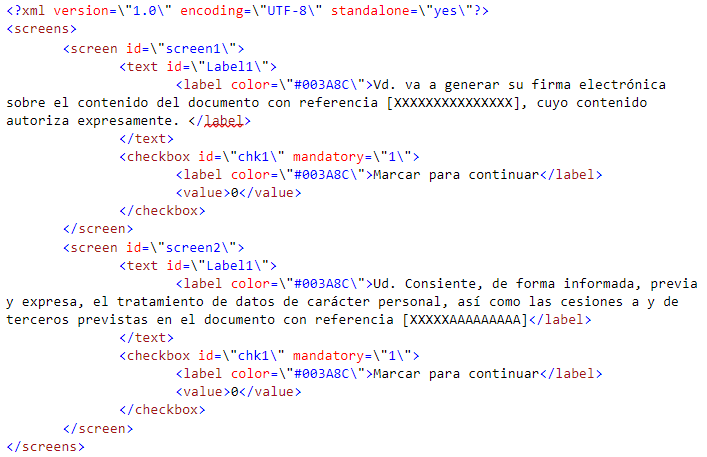
The XML defines the screens that will be present with the screen node. Each screen node can have several controls inside, these controls can be either labels, defined in the text nodes, or checkboxes, defined in the checkbox nodes. These checkboxes can be mandatory in order to advance in the signing process. Whether they are mandatory or not is defined in the mandatory attribute of the checkbox node of the XML file, if its value is 1 it is mandatory and if it is 0 it is optional.
In addition to this screen configuration, some of the parameters are used to configure the look & feel.
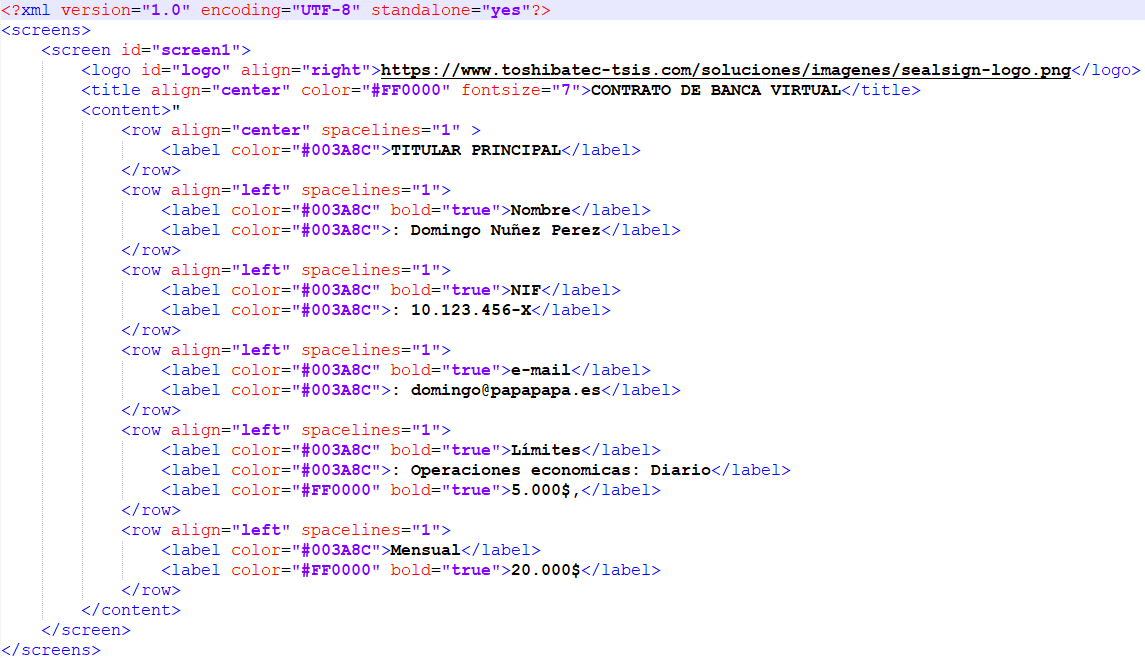
- Final Screen Customization Form: For the handwritten signature process, an XML form can be added where the user can customize the final screen where the signature scribble is entered. This customization does not allow modification of the buttons that appear on the final screen nor the signature guideline line.
This is an example of a valid XML:
It is recommended to download the example code from FactumID's GitHub page to familiarize yourself with these parameters and see how they affect the screen.
- bioSign(string[]): Launches the signature process parameterized with the configuration passed as an argument. Uses the document provider associated with the document URI and its default setting.
- bioSign(string[], string): Launches the signature process parameterized with the configuration passed by argument. It uses the document provider associated to the URI of the document to which the parameters of the second argument are passed.
- bioSignUrl(string[], string): Launches the signature process parameterized with the configuration passed by argument. The document whose URL has been given is signed, it uses the document provider associated to the document URI and its default parameterization.
- bioSignUrl(string[], string, string): Launches the signature process parameterized with the configuration passed by argument. The document whose URL has been given is signed, it uses the document provider associated to the URI of the document to which the parameters of the second argument are passed.
- bioSignBase64(string[], string): Launches the signature process parameterized with the configuration passed by argument. It signs the document set in the second parameter in base64, uses the document provider associated to the URI of the document and its default parameterization.
- bioSignBase64(string[], string, string): Launches the signature process parameterized with the configuration passed by argument. It signs the document set in the second parameter in base64, it uses the document provider associated to the URI of the document to which the parameters of the second argument are passed.
4.4.4 Using Remote Document Provider
In order to use the Remote Document Provider, the configuration parameters must be configured, for this purpose the following steps must be followed:
- Set the server version to 4.0 by calling the setServerVersion method with the value 'V40'.
- Call the function setDSSRemoteProviderConfiguration with the following parameters:
- url: the url where the Remote Document Provider is hosted.
- domain: domain of the user with which the call to the Remote Document Provider will be authenticated.
- user: user with which the call to the Remote Document Provider will be authenticated.
- password: password of the user with which the call to the Remote Document Provider will be authenticated.
Important: if the call needs to be authenticated, the authentication will be basic.
4.5 Enrollment
- Parameters: The first parameter of the different signatures of the biometric signature methods is a string array that configures the behavior of the component.
- Service URL
- Success URL
- Error URL
- Cancellation URL
- Basic authentication user
- Basic authentication password
- User to which the enrollment will be made (Optional), if this parameter is not passed, the enrollment will be applied to the user who authenticates the service.
- Cancel button text
- Delete button text
- Text of the Sign button
- Parameters of global customization (Font, Width and height of the sale, Font size)
- XML with the signature panel form settings
The configuration of this form is the last parameter of those described in the previous section.
This is an example of a valid XML:
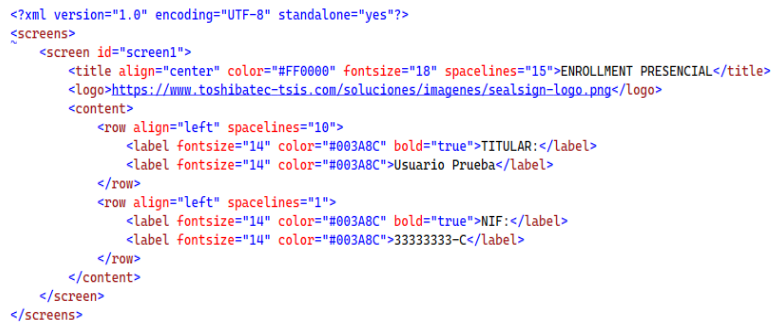
The XML defines the screens that will be present with the screen node. In addition to this screen configuration, some of the parameters are used to configure the look & feel, such as font color, logo, and text size.
- bioEnrollment (string[]): Launches the face-to-face signature enroolment process parameterized with the configuration passed as an argument. It uses the document provider associated to the document URI and its default parameterization.
4.6 Window
To close the window you can invoke the javascript method closeWindow
hub.server.closeWindow();
NOTE: When calling the CloseWindow function, the signature window will close, and the AsyncOperationComplete function will indicate a response status of CanceledExternally, signifying that the signing process was canceled externally
4.7 Launch External Processes
Function that executes a command and allows launching external processes from the signing app
hub.server.launchExternalApp(command);
5. Troubleshooting
To resolve potential issues with the SealSign Signature Client, try applying one of the actions from the following list:
1. Close and Restart the Signature Client
- Manually close the SealSign Signature Client application from the taskbar.
- Refresh the browser cache and launch the signing process again.
Note:
You can refresh the cache by executing the following command:on the page sealsign.es.
How to close the application:
Right-click on the SealSign icon running in the taskbar and select it to close.
2. Reinstall the Signature Client
- Uninstall the SealSign Signature Client application.
- Proceed to reinstall it.
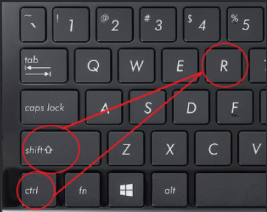
- Refresh the browser cache (CTRL + SHIFT + R on sealsign.es).
- Launch the signing process again.
3. Try a Different Browser
- Attempt the signing process using a different browser.
- If it works with the new browser, report the issue to support, indicating the name of the browser where the problem occurred.
4. Complete Removal of the Signature Client (Last Resort)
If the previous options do not resolve the issue, remove all traces of the signature client by following these steps:
- Verify that the
SealSign Signature Clientapplication is not running. - Delete the contents of the following paths in the Windows File Explorer:
-
%UserProfile%\AppData\Local\Apps
-
%UserProfile%\AppData\Roaming\11paths
- Run CMD as an administrator and execute the following command:
reg delete HKCU\SOFTWARE\Classes\clickonce
Information to Send to the Support Department
If none of the previously mentioned actions resolve the issue, the following information must be sent to the support department:
- 🖥️ Type/Model and name of the computer where the signing process is being performed.
- 🌐 Name and version of the browser being used for signing.
- ✍️ Type/Model of the digital tablet, if performing a biometric signature.
- 🖼️ Evidence or screenshots of the error encountered.
- 📝 Brief description of the steps followed by the signer during the signing process.
- 📂 Attach the log file located at the following path:
%UserProfile%\AppData\Roaming\sealsignBSSClient